
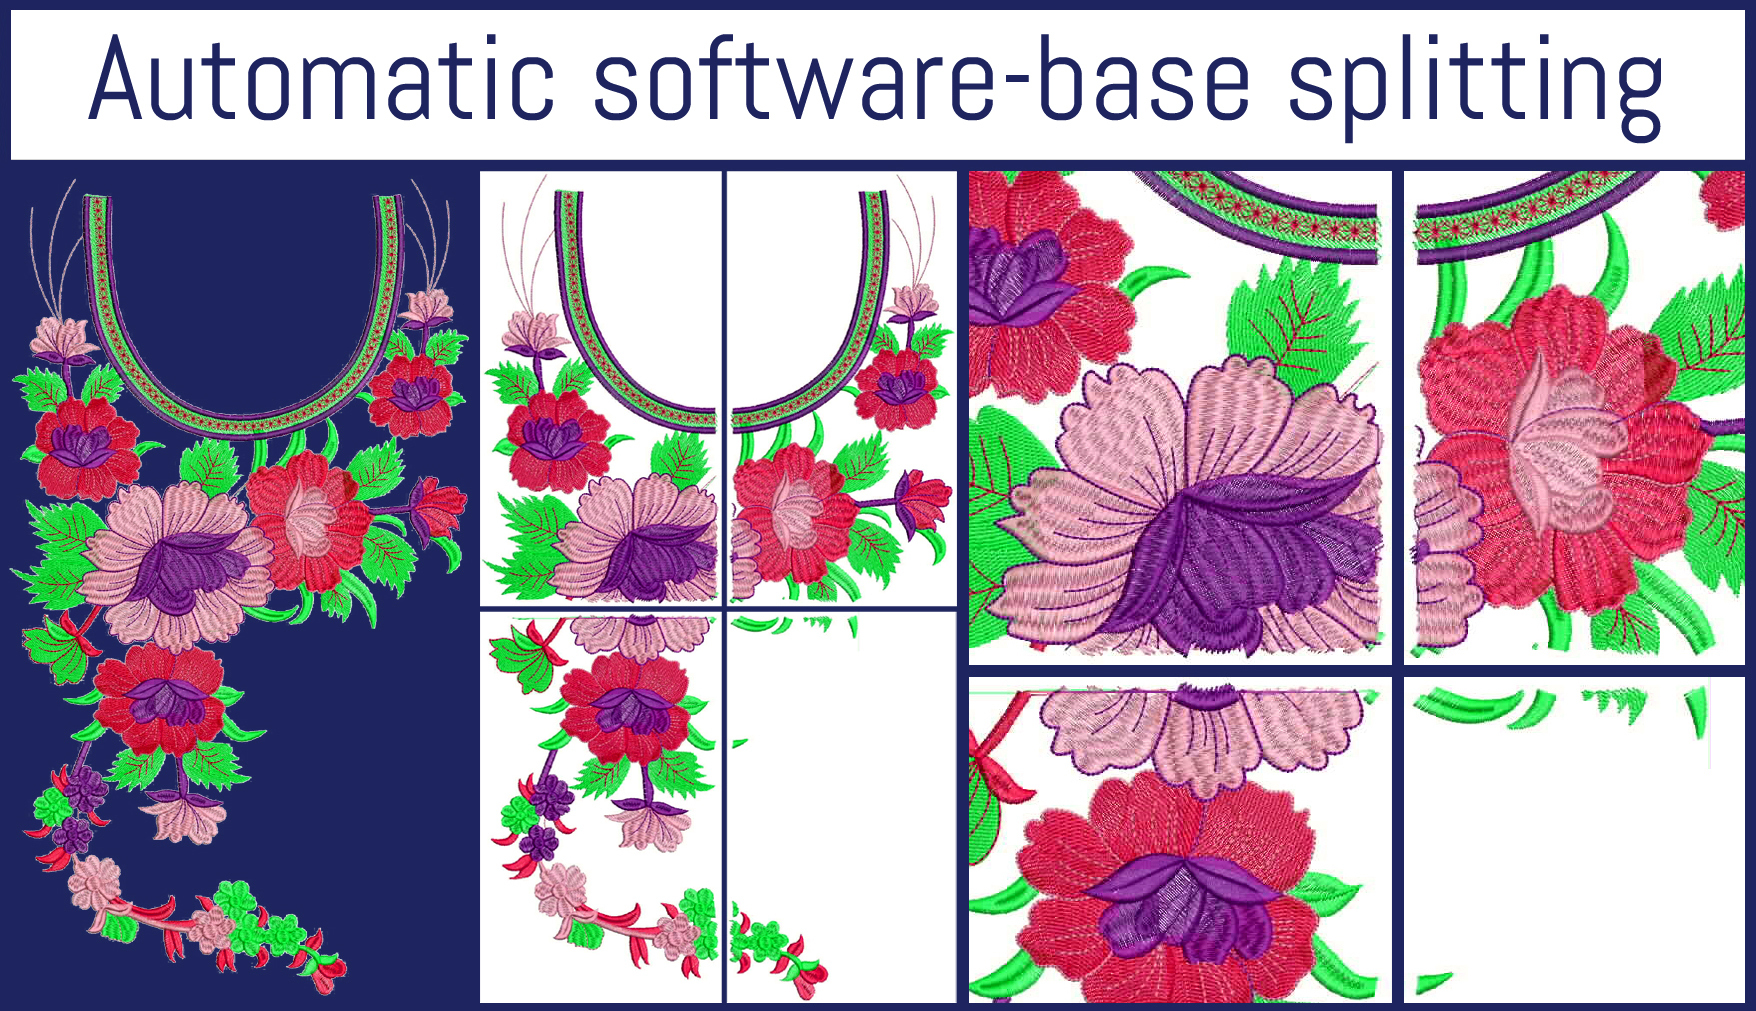
Still confused, how you can digitize huge embroidery design into smaller hoop machine? Don't worry! Simply by splitting embroidery file. We will discuss how to split an embroidery design. We will also discuss Hoop size, Trims, and Stitching options. Hopefully, you'll find this helpful!
If you don’t know how to split an embroidery designs, you can always hire our professional embroidery designers to split big designs for you into smaller parts to make them in the hoop embroidery designs.
If you are a newbie to embroidery, you may be wondering how to split an embroidery design. In this article, I'll share a few basic softwares with you.
Intelligent Split helps to split an embroidery design
When using an embroidery software program, an intelligent split is a great way to split an embroidery design into several smaller parts. While the straight line split cuts the embroidery design into two pieces, an intelligent split allows you to overlap different sections of the design.
This can save you time and money, and you can create many different looks from the same design. To use intelligent Split, you must use the appropriate program. If you want to split an embroidery design, read on to learn how to use it.
Firstly, the split line will automatically route itself through jumps and gaps to avoid cutting through solid embroidery areas. This method will split a large design into a narrow part, while embroidery that fits within one stitch area will remain in a single piece. Once you have placed the embroidery design in the hoop, the Split Project Wizard will display the current hoop. You can then adjust the overlap and compensation levels for the split lines.
Embrilliance Essentials
If you are doing embroidery, you may wonder how to split an embroidery design. There are different methods to divide a design so that it fits perfectly in the 130 x 180 mm hoop. To split a design, choose a method that suits your specific needs. A split embroidery design can be created with embroidery software, such as Embrilliance Essentials. This software will help you divide the design into sections and sew each section together.
The Corner stitch is an option for lightly stitched embroidery and can be useful when there are a few splits within a design element. The Baste stitch, on the other hand, adds a box of long single stitches at the end of each split section.
The alignment stitches go halfway across the overlap between the hoop areas or to the corners of each section. Both of these stitches have different stitch counts, so be sure to use the appropriate stitch type to split your embroidery design.
Trims
First, let's talk about stitches. Alignment stitches help you align split sections. The corner stitch is an example of this. It goes halfway across the overlap area between two sections, and it's useful for lightly stitched embroideries.
When deleting stitches from a design, you can divide it into two or more parts. This will create a new design that will have its own set of stitches. Splitting stitches will make the design easier to adjust because you won't be adding or removing stitches.
You can then save it as two separate designs. However, you will not be able to edit the split design as you would with the original. It's recommended that you save a template of the split design before splitting it.
Embird Stitching options
To split an embroidery design into sections, first, select the file name and click Save. Then, click on the "Split" button. Embird will automatically rename the files you create, so you may want to name one SUNFLOWR_1 and the other SUNFLOWR_2. Then, choose the "Worksheets" option and enter the desired dimensions and thread colors. You can also choose to use the template to align the sections.
There are several types of stitches available to use when splitting an embroidery design. Some stitches are used for heavy stitching or for difficult-to-line-up areas. To compensate for the pull on the fabric, basting adds overlapping stitches along the edges of the design.
 |
Other options include None and High. Low is used for light stitching, while High is used for dense embroidery and long splits through stitch areas.
Still looking for eye catching free embroidery designs? Make sure to headover to embdesigntube.com for all kind of latest embroidery designs for your business today!