


Quick answer: Embroider heavy denim with a sharp 90/14 needle (80/12 on lighter denim), cutaway backing for large or dense jacket backs, standard to slightly reduced fill density, and compensation built into the file to counter push and pull across big stitch fields. Use a jacket-back frame or a secure float, stitch from the center out, and test on the actual jacket before a run. DST suits most commercial machines.
Jacket backs are the premium canvas of embroidery. A large emblem, a scrolling western yoke or a layered patch set on a denim jacket carries a price that a left-chest logo never will. It also exposes every weakness in a file. Thick denim and seams deflect needles, a 10-inch stitch field shifts as thousands of stitches accumulate, and a garment this bulky is hard to hoop without distortion. When a jacket-back run goes wrong, it goes wrong on a garment that is expensive to replace.
EmbDesignTube.com supplies production-ready, stitch-tested files for jacket backs, western yokes and patch sets. This guide covers what makes denim different, the stitch settings and compensation that work on heavy fabric, how to hoop and sequence large designs, and which styles are selling.
Why Denim Jacket Embroidery Needs Its Own Settings
Denim looks easy because it is stable, but three factors make jacket work different from shirts and polos.
- Weight and weave. Jacket denim is often much heavier than shirting. A tight, dense twill resists the needle, so density and needle choice matter more than on soft knits.
- Seams and thickness. Center-back seams, yoke seams and double-stitched panels create ridges that deflect needles and break thread.
- Scale. Back designs are large. Across a big field, fabric shifts, outlines drift away from fills, and small errors compound.
A denim-specific file accounts for all three with measured density, compensation tuned to a large field, and sequencing that keeps the fabric anchored.
Stitch Settings for Heavy Denim
The values below are common starting points. Denim weight, wash, thread and machine vary, so confirm with a test stitch-out on the actual jacket.
| Setting | Starting point for heavy denim | Why it matters |
|---|---|---|
| Needle | Sharp 90/14; 80/12 on lighter denim; up to 100/16 over thick seams | Pierces dense twill cleanly and reduces deflection and breaks |
| Thread | 40 wt polyester or rayon | Strong enough for a big stitch field and for washing |
| Fill density | Around 0.40-0.45 mm line spacing; slightly more open on very dense twill | Over-dense fills stiffen the jacket and break thread |
| Satin columns | Roughly 1.5-7 mm wide; split wider areas | Long satins snag and loosen on a big field |
| Underlay | Edge-run plus zigzag or lattice under fills | Gives stitches a firm platform on thick weave |
| Speed | Moderate, often around 600-750 stitches per minute | Reduces breaks over seams and thick areas |
| Backing | Cutaway for large or dense designs | Keeps big fields stable through wear and washing |
Why reduce density on heavy twill?
Denim is already a dense surface. A fill digitized for a soft knit packs too many stitches into a weave that cannot absorb them, which leaves a board-stiff patch and strains the needle. Aim for clean coverage with the lowest density that fully covers the weave, and let the underlay do the structural work.
Push and Pull Compensation Across Large Fields
Compensation is the single biggest difference between a small logo and a jacket back. Two effects work against you:
- Pull: satin columns and fills draw the fabric inward as thread tightens, so shapes end up narrower than designed.
- Push: fabric displaces outward in the stitch direction, so outlines can drift away from fills and leave gaps.
On stable denim, pull compensation is often modest, commonly a few tenths of a millimeter of added width on satin columns and fill edges. The bigger risk is cumulative push across a large design, which is why jacket-back files use several techniques together:
- Overlap fills slightly under outlines so small shifts do not open gaps.
- Break big fills into sections with consistent stitch angles so pull stays balanced.
- Stitch the underlay first across the whole region, then the top stitching, to stabilize the fabric.
- Keep outlines and fine detail late in the sequence, after the fabric has been anchored.
Because compensation depends on fabric, thread and hooping, test and adjust. If a design needs more than a modest size change, resize from the source file so density and compensation recalculate. Our commercial embroidery designs DST PES guide explains why scaling a finished stitch file causes problems.
Stitch Counts and Sizes for Jacket Back Designs
Jacket-back stitch counts vary widely with size and detail. These ranges are rough planning figures. Complex artwork, dense fills and heavy fabric can push a design well beyond them.
| Design type | Typical width | Typical stitch count | Notes |
|---|---|---|---|
| Upper-back or yoke logo | 4 to 8 in (100-200 mm) | 8,000 to 20,000 | Quick to run; common on western shirts and light jackets |
| Mid-size back emblem or crest | 8 to 10 in (200-255 mm) | 15,000 to 35,000 | Needs sectioned fills and solid compensation |
| Full-back scrollwork or artwork | 10 to 14 in (255-355 mm) | 30,000 to 60,000+ | Check frame limits; plan for long run times |
| Patch or appliqué set | Varies | Often lower than a full fill design | Fewer stitches, but placement and trimming matter |
Check your machine's maximum embroidery field before buying or approving a large file. Many commercial heads support large fields, but jacket and sleeve clearance can limit what you can stitch in practice.
Hooping and Setup for Jacket Backs
Bulk is the main enemy. A jacket that is hooped badly will shift, pucker or catch on the machine no matter how good the file is.
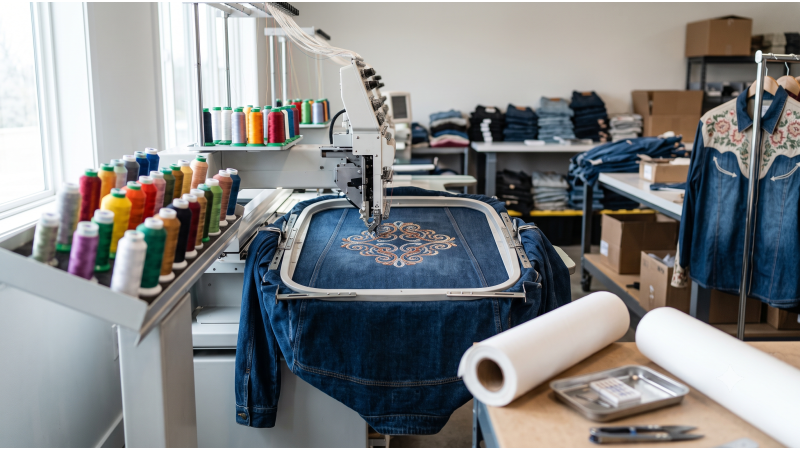
- Use the right frame. Jacket-back frames, large flatbed hoops and magnetic hoops all work. Choose one that holds the denim firmly without crushing seams.
- Float when you must. For thick or lined jackets, hoop the backing and float the jacket on top with temporary adhesive or pins to avoid hoop burn and distortion.
- Center on the seam. Align the design to the center-back seam and check it against the yoke seam so the emblem sits straight.
- Avoid stitching over thick seams. Where a ridge cannot be avoided, use a 100/16 needle locally and slow the machine.
- Clear the bulk. Clamp sleeves, collar, pockets and any lining away from the stitch field and under the machine arm.
- Run a trace. Trace the full design boundary to confirm hoop and clearance before stitching.
Cutaway vs. tearaway on denim
Denim is stable enough that tearaway works for small, light designs. For jacket backs, cutaway is the safer choice because a large stitch field needs support that survives hundreds of wears and washes. A medium-weight cutaway, often around 2.5 to 3 oz, suits most work. For very large or dense designs, use a firmer grade or double layer so the stitching cannot ripple.
Looking for jacket-back files? Explore the EmbDesignTube design collection for back motifs, western scrollwork and patch sets, or send artwork through our custom digitizing service for a denim-specific build.
Sequencing Large Designs
Order of stitching controls how the denim moves under the needle, and large designs magnify that effect.
- Center-out. Start in the middle and work outward so fabric is held evenly.
- Underlay across regions first. Stabilize areas before top stitching them.
- Large elements before small. Stitch major fills first, then outlines, then fine detail.
- Minimize jumps. Long travels across a big field create loose threads and trimming work. Plan trims where they are needed.
- Limit color changes. Fewer changes mean fewer trims and less registration drift. DST stores color stops, not thread colors, so write a thread chart with the file.
Western Yokes: Scrollwork, Florals and Filigree
Western wear is a specialty niche with loyal buyers. The classic look is a back or front yoke covered in scrollwork, tooled florals, fringe-style motifs and filigree borders, stitched in contrasting thread. A few points are specific to yokes.
- Lighter fabrics. Many western shirts use cotton or chambray, far lighter than jacket denim. Reduce density, use a smaller needle, and switch to lighter backing so the yoke does not stiffen.
- Curved shapes. Yokes are V- or scalloped-shaped. Digitize the design to follow the contour and keep it symmetrical around the center seam.
- Satin and fill balance. Use satin for scroll lines and fill for solid florals, and keep fine lines wide enough to read at a distance.
- Borders and edging. Lines and borders along yoke edges frame the design. Browse the border bulk designs for edging options.
- Placement standards. Keep yoke motifs centered and consistent across sizes, and verify against the style guide.
Styles Selling on Denim and Western Wear
- Large scrollwork backs. Ornate full-back emblems are the statement piece for custom denim and western jackets.
- Western yoke florals. Tooled-leather-inspired motifs and filigree sell across shirts, jackets and vests.
- Vintage chain-stitch looks. Retro textures suit heritage and workwear brands and photograph well.
- Patch sets and appliqué. Layered patches and badges add dimension and reduce stitch counts. Browse the appliqué and patch bulk designs.
- Raised accents. Puff lettering on denim jackets bridges streetwear and western styles. See our 3D puff embroidery designs for streetwear guide for foam and density rules.
Denim Embroidery Troubleshooting Guide
| Problem | Likely cause | Fix |
|---|---|---|
| Frequent needle or thread breaks | Dull or small needle, density too high, thick seam | Fit a fresh sharp 90/14 (100/16 over seams), slow down, open up density |
| Gaps between fill and outline | Push across a large field, weak compensation | Add overlap and compensation, check hooping tension |
| Design looks narrow or distorted | Pull not compensated | Add pull compensation in the file |
| Jacket back puckers | Weak backing or over-tight hooping | Use firmer cutaway and hoop without stretching |
| Stiff, board-like patch | Fills too dense | Open density and rely on underlay |
| Hoop marks on denim | Over-tight clamping | Float the garment or use a magnetic hoop |
| Design off-center or crooked | Poor alignment to seam | Use a placement guide and center on the back seam |
Why Denim and Western Wear Brands Choose EmbDesignTube
- Built for large fields: compensation, sequencing and underlay planned for jacket-back scale.
- Denim-aware density: files tuned for heavy twill rather than copied from soft-knit settings.
- Commercial formats: DST, PES, EXP, JEF and EMB for Tajima, Barudan, Ricoma, Melco and Brother systems.
- Stock or custom: download ready-made motifs or send artwork to our digitizing service.
- Direct support: ask about jacket files on WhatsApp, Telegram, or the contact page.
Pricing Large Jobs and Choosing Ready-Made or Custom Files
Large designs mean long run times, so price on machine hours and handling as well as stitch count, and test the first jacket before you quote repeats. For stock scrollwork and common back emblems, ready-made files are already stitch-tested and save days. For a brand's own artwork, custom digitizing is usually worth it. Our guide to buying embroidery designs for commercial use compares cost per piece, turnaround and licensing. If you also run uniforms or workwear, see our left-chest embroidery designs for uniforms guide, and for cap runs, our commercial DST embroidery designs for caps guide.
Related Reading
- Commercial Embroidery Designs DST PES: Production File Guide
- Left-Chest Embroidery Designs for Uniforms: Stitch Count Guide
- 3D Puff Embroidery Designs for Streetwear Hoodies: Guide
- Buy Embroidery Designs Commercial Use: Custom vs Pre-Digitized
Frequently Asked Questions
What needle should I use to embroider a denim jacket?
A sharp 90/14 needle suits most heavy denim, with 80/12 for lighter denim and 100/16 for thick seams. Sharp points pierce dense twill cleanly and reduce deflection and thread breaks. Replace needles often, because a dull point is a common cause of breaks on heavy fabric.
How many stitches does a denim jacket back design have?
It depends on size and detail. A small yoke or upper-back logo may run roughly 8,000 to 20,000 stitches, a mid-size emblem 15,000 to 35,000, and a full-back design 30,000 to 60,000 or more. Check your machine's field limit and run a test before quoting.
Should I use cutaway or tearaway backing on denim jackets?
Use cutaway for jacket backs, especially large or dense designs, because it keeps the stitch field stable through wear and washing. Tearaway can work for small, light designs on stable denim, but it is less reliable for large areas. A medium-weight cutaway, often around 2.5 to 3 oz, suits most jackets.
How do you hoop a jacket back for embroidery?
Use a jacket-back frame, large hoop or magnetic hoop that holds the denim firmly without crushing seams. For thick or lined jackets, hoop the backing and float the jacket on top. Center the design on the back seam, clamp sleeves and lining clear of the stitch field, and run a trace before stitching.
Ready to stitch cleaner jacket backs? Browse all EmbDesignTube designs, or contact our team to find the right file for your machine and jacket.